Friday, December 10, 2010

Photoshop Final Projects


I colorized this black and white picture of my little brother.

I created a logo for one of my favorite musical groups, Celtic Woman.

I created this goofy magazine cover with my mom and sister. It was a Canadian joke. :)

I made this storyboard for my parents for Christmas!

For a creative way to use this photo of an old cell phone, I decided to turn it into Rapunzel's tower, with the Prince coming to rescue her.  :)

I created a book cover for my favorite book, Pride and Prejudice.


I restored this old photograph.


I added myself to this poster. It is not perfect but I thought it turned out pretty well!

I made this self-portrait collage.

I also created this t-shirt design!

Wednesday, November 24, 2010

Happy Thanksgiving!

I made a collage of some of the MANY things that I am thankful for. I have been so blessed with many, many things, and I so often forget how blessed I truly am. I thank God for all the wonderful people He has put in my life and for this country of freedom that I have the privilege to live in!

Wednesday, November 17, 2010

Week 13-Photoshop Actions

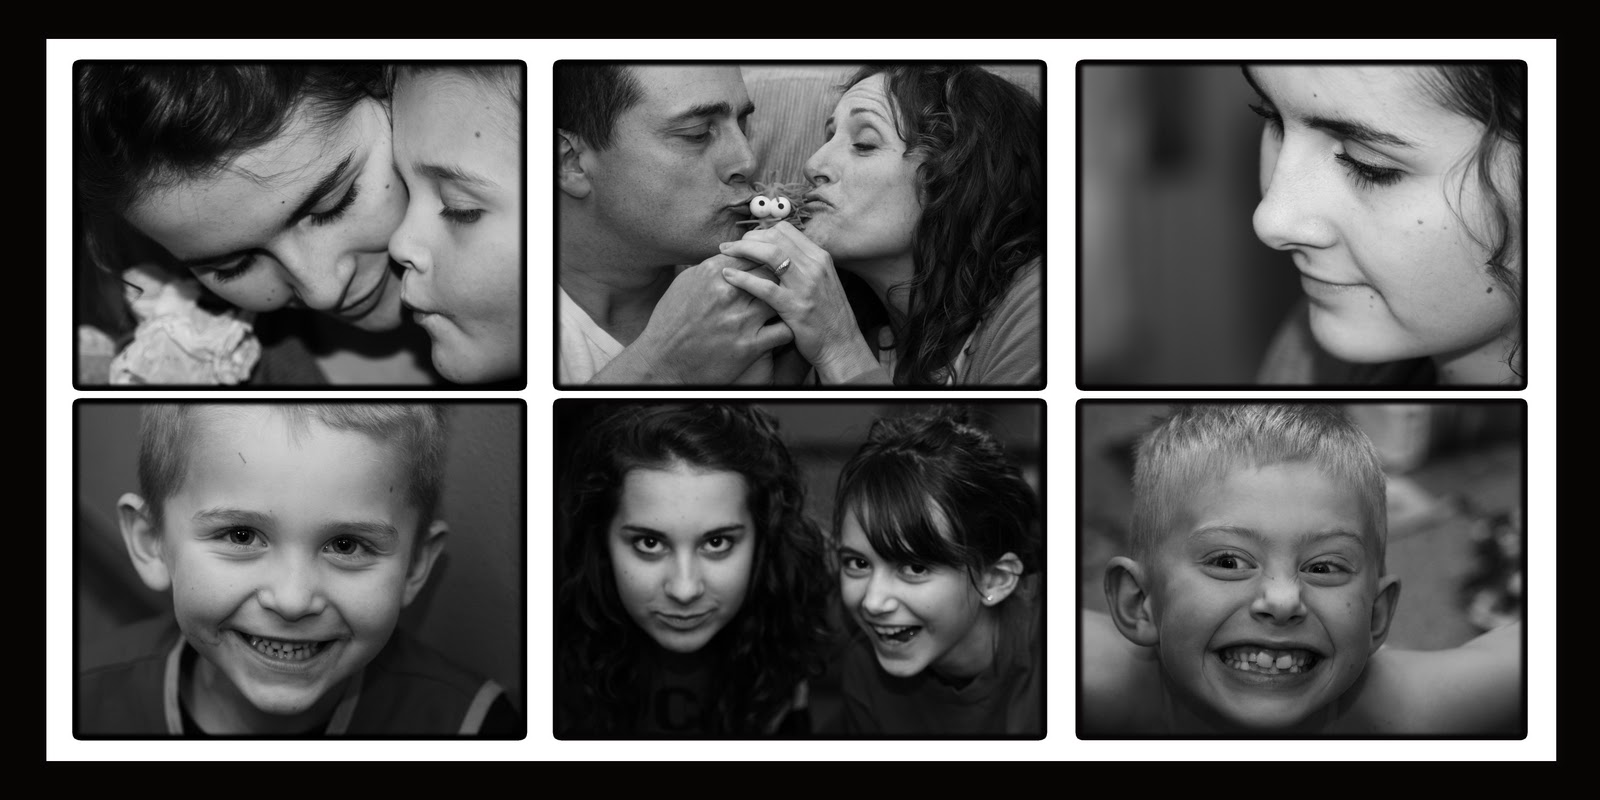
I used a Photoshop Action for this picture that I found on deviantart.com. The action is called "Polaroid Generator".

For this picture, I used a Photoshop action from deviantart.com called "Cinematic Effect".

For this picture of my sister and I, I used a Photoshop action called "Vintage Effect"!

On this picture, I wanted to create a somewhat vintage effect, so I used an action from deviantart.com called (I think) "Retro".

On most of these pictures, I also used an action called "Skin Smoothing" from deviantart.com. This was just to even out all the skin tones in the pictures.

That was my week's work! I had a lot of fun using Photoshop actions this week!!!

Wednesday, November 10, 2010

Week 12-Fake Tilt Shot Pictures

I found a picture of the Colosseum in Rome and decided to make it into a fake tilt-shift photo.


I also found a picture of the Arc de Triomphe and made it into a fake tilt-shift photo.


This picture of the Munich Philharmonic Orchestra was perfect for doing a fake tilt-shift photo.


This is a picture of Omsk, Russia. I don't feel that it looks like a miniature, but I thought that the blurring worked well with the picture.


That was my work for the week!!

Friday, November 5, 2010

Week 11 work-Tutorials


I took the original of this picture (above) and decided to change the color of the roof to green.


I didn't like the color of the apples in the original picture (above), so I decided to change the color of the apples using the color replacement tool. I think that it worked really well!

I took this picture at one of our school's football games. The image was really dark, so I decided to adjust the shadow/highlight in the picture.


I found this picture (above) of gondolas in Venice, Italy. Using text as a layer mask, I made the image so that you can only see the picture through the letters.

Thursday, October 28, 2010

Week 10-Halloween photos

I decided to take this picture and edit it. I didn't want to make it look really creepy or evil because I don't like Halloween or the mind set it encourages. However, I did like the way that this picture turned out. My sister helped me to come up with ideas! 


When I edited this picture, I made it look a bit smokey using the smudge tool. I also used a texture that I place over the top of the original picture.

Friday, October 22, 2010

Week 9-Working with Brushes

I decided to add a fun affect to this picture by using music note brushes!
On this picture, I just opened a blank document and decided to make a name plate by using baroque style brushes, as well as text.
I used a cloud brush tool to add some more dimension to the clouds in this picture. I tried to make it look a little bit stormy!


That was my week 9 work!

Friday, October 15, 2010

Week 8 work-Editing photos using tutorials

On this photo, I used a tutorial from Atomic Learning to remove many of the wrinkles of the man in the center of the picture.

This was a picture that I took at one of our school's football games. I was still trying to get used to all of the settings on the camera, so this picture was too dark. I used a tutorial from Atomic Learning to find out one way to lighten this picture.

I am editing my friend's senior pictures for her, so I took this picture and followed the steps of a 9tuts tutorial to enhance the photo and add more contrast. I was really happy with the way that it turned out!

In this picture of my two best friends (one being my sister!), I chose to follow an Atomic Leaning tutorial to find out how to enhance the eyes in the picture. The eyes were a bit dark in the first photo, so I chose to make them brighter by using different layers.

Thursday, October 7, 2010

Week 7 Part 2 - Text on working paths

I found this picture of the Catalina Mountains in Tucson, AZ. I decided to add text to the picture, trying to at least roughly follow the line of the mountain.

I also found this picture of Basilica di Santa Maria del Fiore in Florence, Itlay. I decided to add text to this picture, too.   
This beautiful picture of the Eiffel Tower is from Google. I chose one of the colors from the picture to use as the font color. I also used the outline of the Eiffel Tower as a work path to type the text along.